There are fundamentals to any craft or trade, including woodworking. One of these fundamentals is creating a flat, square piece that you can cut to size for a project. You can buy panels or lengths that are almost ready-to-go, but if you have the shop space and the desire to do it yourself, you can machine your own rough-cut lumber into dimensioned pieces. To do this, you will need mad hand plane skills and a ton of elbow grease, or machinery including a jointer and a planer.
If you decide to go down the machinery route, you might wonder: do I really need *both* a jointer and a planer? The quick answer is “yes” — and in the next few paragraphs we will explain why.
How your jointer and planer work together to mill lumber
People often wonder if these machines are the same — but they are not. Although they both machine wood using a cutterhead or cutter block, you’ll only get a flat, square piece of wood if you use both. They work in cooperation with each other to get a properly machined and dimensioned board.
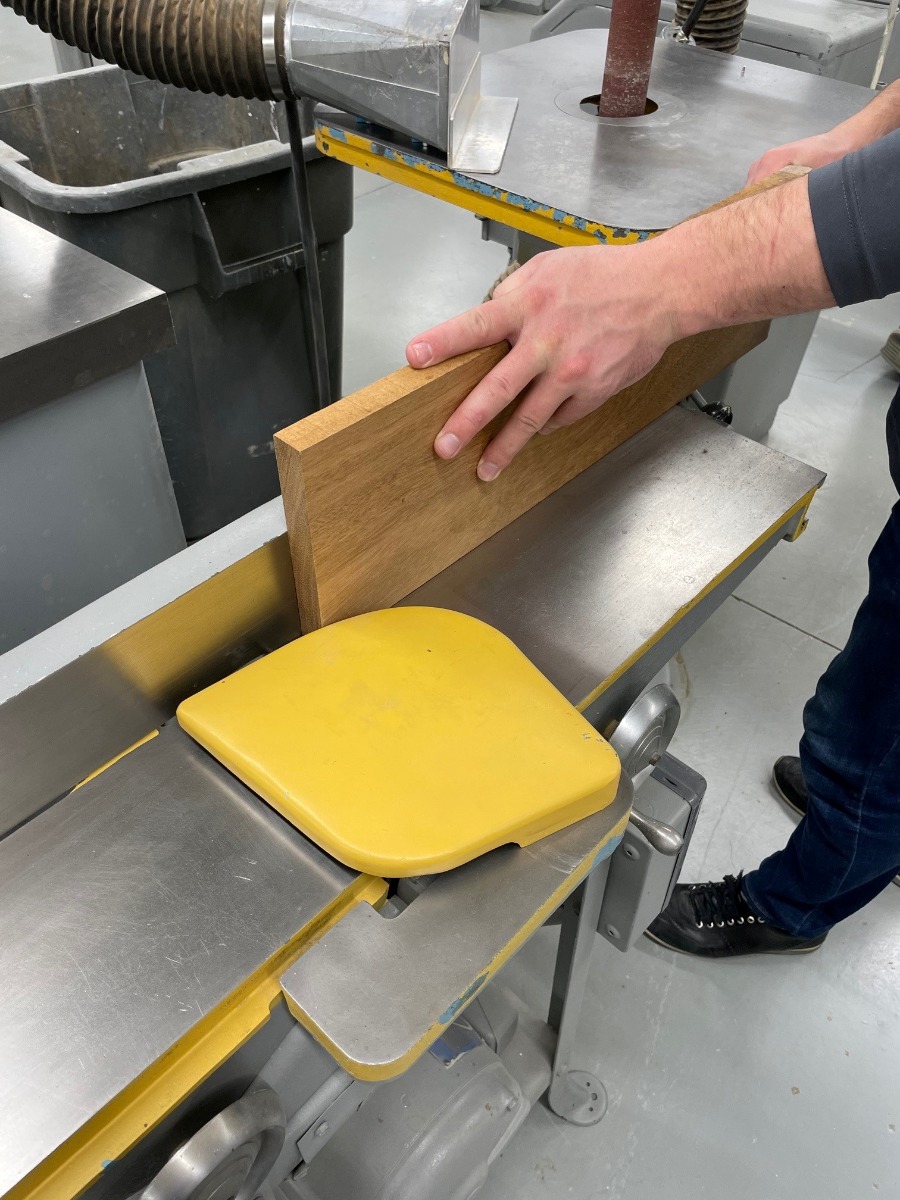
The jointer is used like an upside-down plane. Think of a #7 jointing plane that has been flipped over. You run the edge of your board over the blade, and after a few passes the plane has created a flat surface on the board from end to end. The jointer machine does the same thing, but you are moving the wood over the blade and the cutter block is powered by the motor.
After flattening the edge of your board, you’ll flatten the face. Set your newly flattened edge against the fence and run the face over the cutterhead for several passes — until you’ve made one continuous cut across the wood. What you have now is a side and a face that are flat and at 90 degrees to each other.
This is the value of the jointer in the milling process. Without the jointer creating those flat surfaces, the planer could follow any irregularities in the surface of the wood and re-create those as it thins down your board.
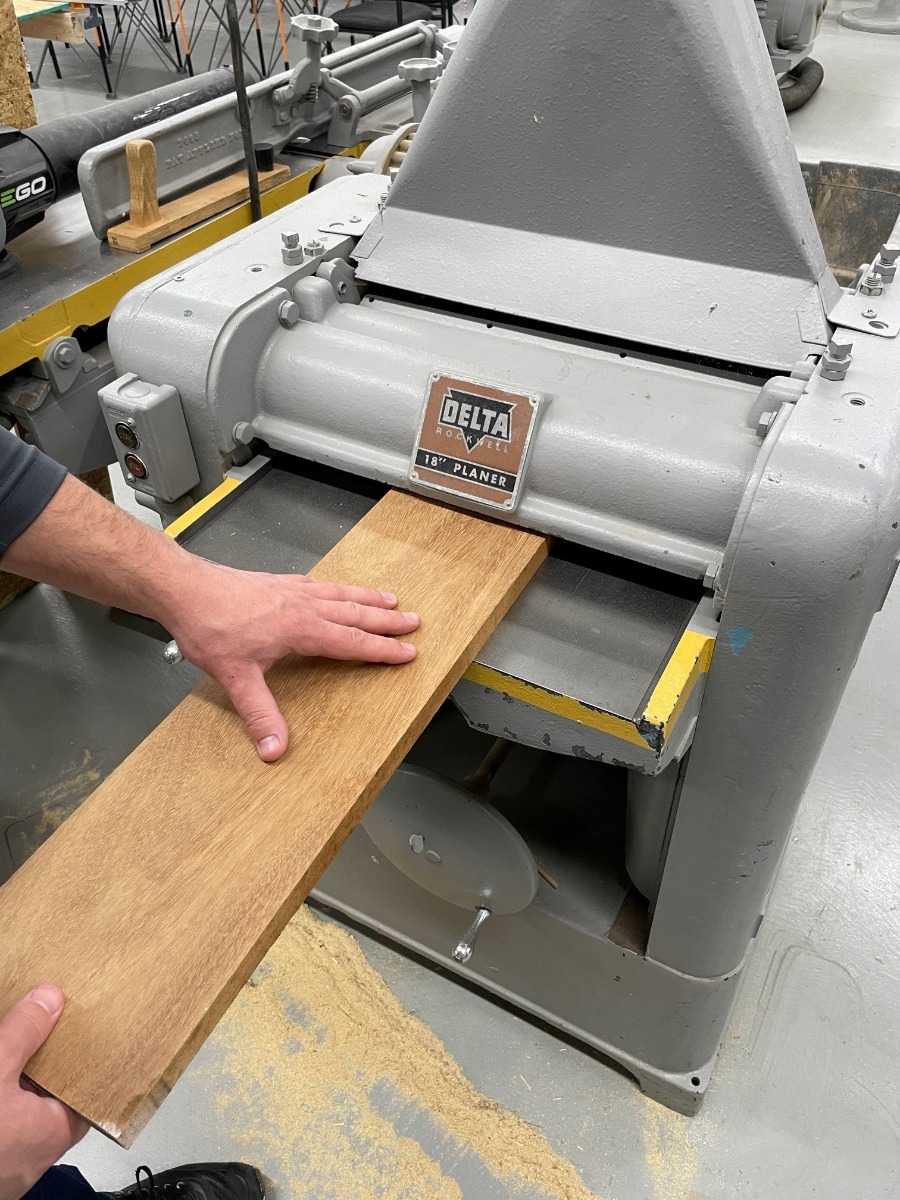
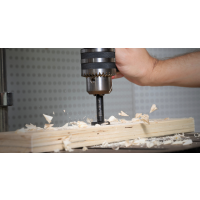
Having used your jointer to flatten your board, you can use your planer (sometimes called a thicknesser) to slowly trim the wood down to the desired thickness for your project. The flat face you created with the jointer helps the planer to take a continuous cut off the top of the board that has not been machined yet, resulting in a board that is the same thickness from one end to the other.
It will take several passes to get what you need, and it is always good to sneak up on it. Taking it slow also creates a better machined finish. Having a good ruler, tape, or set of calipers is a good way to measure as you approach the finish line.
To finish milling your board, set the board’s flat face against the jointer fence and run the untouched edge through. The result is a square board that’s the desired thickness for your project.
A few things to consider
There are, of course, several things to keep in mind when you’re milling wood. The first is to make sure you’re only machining dry wood. This means buying kiln-dried timber from a trusted supplier, or rough sawing the larger boards yourself and storing them. If you decide to try the latter method, you can use a moisture meter to keep track of the moisture content in the board. Wood is generally considered dry when it is in the 6% to 8% moisture content range. There are a number of moisture reading devices on the market as well as articles, charts, and other information to help you if you want to know more.
Machining the timber in this way releases the surface tension in the board. This means that any shape, twist, or bend that was in the board before you machined it is likely to return if you leave it for any period of time. Think of it like pulling a spring and then releasing it — the spring always tries to return to its coiled position. The same applies to timber.
If you decide to mill your own wood, you’ll want to joint, plane, and cut your pieces to size in the shortest amount of time possible. Not only is this a great workflow method, but it also helps prevent your wood from warping as much. If you must store boards that are machined but not cut, they should be stored horizontally and in as dry an environment as possible.
With timber prices currently, doing this work yourself may be cost-saving on your next build. Make sure your setup is good, your blades are sharp, and you have the time to do this work in a methodical way. Planning pays off in this area. Good luck!
Looking for more tips and tricks to help you on your woodworking journey? Sign up for our newsletter for all the latest in articles, videos, and product updates!