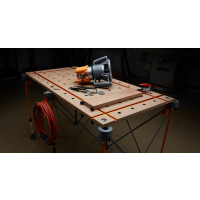
You might look at sawhorses as an accessory found on a construction site or deep within the caverns of a large warehouse. However, sawhorses offer several benefits for do it yourselfers that know how to get the most out of the highly functional home improvement accessories. You can use a properly constructed set of sawhorses to stack heavy sections of lumber and when the project is over, transform two of the sawhorses into a table for taking a lunch break.
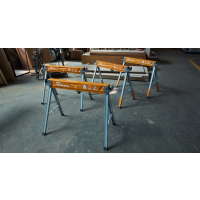
Rugged and versatile, sawhorses are easy to construct. In fact, you can learn how to build a simple sawhorse that takes fewer than 15 minutes.
Constructing a simple sawhorse requires only materials you can find discarded on many construction sites. Throw in a few three-inch screws, and you can complete a $10 sawhorse building project in around 15 minutes.
Start with the I-Beams
As with any home improvement project, you have to prioritize the tasks needed to see the project to its successful end. For a simple sawhorse, the first thing to do involves cutting a two-by-four piece of wood into two pieces, with one piece measuring 47 inches and the second piece running 49 inches. Repeat the step two more times to produce three pieces of lumber of both sizes.
Take two of the 49-inch pieces and mark a center line that runs on the short axis of each end. You should have four markings. Then create a center line down the long axis of each piece of wood. Attach the top board to the board marked with a center line by using one of the three-inch screws. Insert several screws across the length of the top board and into each centerboard. Make sure to keep the center lines exactly aligned to ensure design uniformity.
Connect the Legs
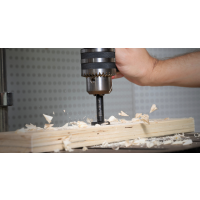
After building the I-Beams, the next step requires you to cut eight 32-inch legs by using the remaining uncut pieces of wood. You should be able to cut three legs out of each two-by-four piece of lumber. Grab one of the 49-inch assembled I-Beams and put the I-Beam on its side. Softly place one of the legs under the top board of the I-Beam. Make sure to attach the leg to be flush with the end of the 49-inch I-Beam. Insert two screws into the center board and insert two screws into the bottom of the I-Beam. When you complete the attachment of one leg, repeat the same process by attaching the second leg on the same side of the I-Beam. Flip the entire assembled pieces of wood and attach two more legs to the backside of the I-Beam.
Attach Side Stringers
Grabbing two more two-by-four pieces of lumber, cut two 49-inch pieces and save the cutoffs for use in the next step. Use a tape measure to add a mark located 10 inches up from the bottom of each of the four legs. A layout square will help you square each mark. Attach one of the two 49-inch cut pieces of wood on the side of the assembled sawhorse. Make sure each 49-inch cut piece aligns perfectly on top of the marks. You should be able to secure the connections by using two screws.
Finally, attach the end stringers by using pieces of the uncut wood stock and placing the uncut pieces over the ends of each side stringer. Decorate your sawhorses to match the mood of the garage or basement where you work.