Sawhorses are some of the most versatile and efficient woodworking tools on the market, and you will find them on worksites all over the world. They can offer so much more than just a reliable stand used to cut wood and other materials, which means an investment in a sawhorse can really pay dividends over the long term.
One great example of how to use a sawhorse in other ways is to create a DIY sawhorse table.
If you aren’t familiar with sawhorse tables, they provide a simple and straightforward way to use sawhorses to create a workbench or workstation. Sawhorses are most commonly known as temporary stands for sawing wood, but with a little creativity and craftsmanship, you can transform these tools into a table that you can use to handle a variety of different projects.
Are you interested in building a DIY sawhorse table? There are just a few simple steps to get started.
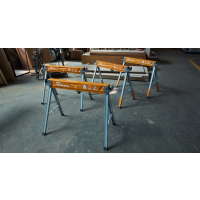
First, you will need two sawhorses. While some people like to construct their own sawhorses from wood, you simply can’t beat the quality of purchasing a sawhorse from a company like BORA tool. Sawhorses such as the Speedhorse are as attractive as they are easy to transport, which means you can set up a sawhorse table at all of your worksites.
After you have obtained your two sawhorses, you will need some wood to build a frame.
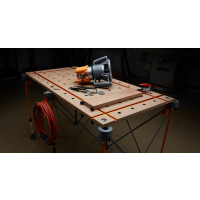
Use two 2x4s as outside rails. For the rungs, ripping 2x4s down to 2x3s should shave about 2.5lbs off of the setup. Cut the 2x3’s into four rungs of 20 ½ inches each.
Screw the rungs to the outside rails, spacing them about every 20 inches or so with a few self-tapping wood screws. Mount the frame into the grooves on the sawhorses, then screw blocks to the outside to trap the frame.
The frame will be able to lock into the tops of your sawhorses without fasteners, which means it is easy to set up and take apart the sawhorse tables.
From there, the idea is to choose a tabletop that can hold up to the tasks you are planning on doing, so make sure to keep that in mind when you are choosing the wood for the top of your sawhorse table. A nice stain and polyurethane finish can class up your DIY sawhorse table if it’s for indoor use.
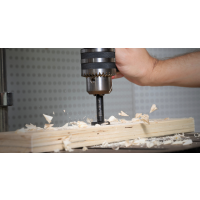
This project should only take an hour or two to complete and can provide a perfect place to mount tools, make long cuts, and much more.
Keeping things simple can go a long way towards improving how you work, so it’s easy to appreciate this straightforward approach to building a sawhorse table. As a reminder, you can purchase the best quality sawhorses on the market from BORA Tool at the best prices.