So — your favorite home improvement show has inspired you to tackle your own kitchen remodeling project? Hold on, tiger! Before you jump in, it’s important to develop a good game plan so you don’t start your project totally unprepared. This will help you complete the project in or around the expected timeline and keep you from getting discouraged if and when things don’t go as smoothly as you initially hoped for.
Understanding the Money, Time, and Skills Needed

First and foremost, understand that major projects like a basic kitchen remodel are expensive and will take four to six weeks minimum for even the most experienced DIYers. Remember that you’ll be working around your full-time job and on weekends. Plus, projects that include major plumbing moves, electrical upgrades, HVAC moves, or wall changes can easily double or triple the timeline. Be realistic with your budget and timeline, planning accordingly to avoid becoming discouraged at any point during your project.
Next, honestly assess your skill set and make sure you’re capable of completing your project. If you need a structural engineer, electrician, or plumber to complete specific sections of the project, consult them early on to understand their associated costs and when they should be called in to complete their portion. Remember that pros are busy! Moving one drain or relocating a couple of outlets will be a low priority to them and may require permits, so don’t be surprised if you have to wait at several points in the project.
Checking Your Tool Inventory
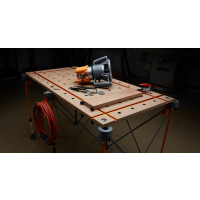
Still excited? Better check your tool inventory next. Stud finders, screw guns, saw blades — oh my! You’ll need basic hand tools and power tools — things like hammers, screwdrivers, circular saw, miter saw, cordless drills and drivers, levels, squares, and more. Cabinet jacks are also wildly handy for installing upper cabinets, and don’t forget you’ll need clamps to hold adjacent cabinets together while installing fasteners. Planning on ceramic or glass tile backsplash or floor? You’ll need a wet saw with a good diamond blade for that. If you want to tear out old flooring, you’ll probably need a floor scraper and stripper.
If you are looking for true professional results, then you’ll definitely need a few specialty tools. You’ll want a few pneumatic tools like a brad nailer, finish nailer, and framing nailer to get that professionally installed look. And some details, like factory-finished cabinet spacers, end panels, and refrigerator cabinet supports, may all need to be cut to fit — which means you may want a specialty blade for your circular saw and a high-quality straight edge for straight, chip-free cuts. When you’re cutting into a $500 matching panel, you’ll want all the help you can get to make sure it’s accurate.
Finishing Your Project

Matching cabinet crown molding is the finishing touch that can make the difference between a final result that looks good and a final result that looks great. A single 96” piece of crown molding to match your cabinets can easily run $150 or more, and to make sure that expensive piece is cut right, you’ll want a high-quality blade for your miter saw.
Don’t forget — you’ll still need to match the angles of your cabinets and transfer those angles to your miter saw so you cut the molding accurately. If your cut is off by just one or two degrees, you’ll have a gap where the miters come together, and there’s no better way to defeat all the effort you’ve already put into your beautiful kitchen than to leave gaps in your miters when you install the crown molding. Simple angle duplicator tools like the BORA MiteriX will help you eliminate that gap to get professional results without costing you extra time and money.
Planning for the Unexpected
One of our employees learned this the hard way on a recent large kitchen project when an unanticipated issue with a leaky old patio door added an extra $1200 bill and a full weekend of extra work to install a new patio door. Even something like trash removal to get rid of old materials can cost you, since you may need to rent a dumpster to get rid of it all. Moral of the story? You have to expect the unexpected and budget for it at the beginning of the project.

Remember: with the right amount of planning; a good understanding of the tools, skills, and time needed; and a budget that covers both the expected and the unexpected, you’re ready to start any home improvement project. By going in with a game plan, you won’t lose excitement or momentum in the middle of the project, and you won’t be caught off-guard by unexpected costs. And after doing one large DIY home improvement project, you’ll be even more prepared for the next one!